When I began roasting vegetables (like broccoli with pine nuts) it was like a whole new world opened up. It's amazing how slow heat and aromatics can transform a vegetable.
Take the plain ole green bean.
Preheat the oven to about 400 degrees. Arrange fresh green beans (about one pound or so) in a single layer on a baking sheet. Top with a chopped onion, yellow or white, your choice. Drizzle with olive oil and sprinkle with salt and pepper.
Put in the oven and that's it! Stir a few times and let roast for 20 to 25 minutes.
Any leftovers can be folded into a pasta dish the next night.
Monday, December 6, 2010
Wednesday, November 10, 2010
Beef Ragu Over Spaghetti Squash
From Fine Cooking magazine
When I made this last night for dinner, I skipped entirely that first part about the garlic bread; we had some in the freezer so I baked that instead.
I love the use of spaghetti squash instead of pasta - it makes a nice change. I thought the sauce could have used about an hour or two more cooking time to give it more depth. Next time, I'll use some Roasted Tomato Sauce from our freezer or a jar of our favorite kind from a store.
Overall, thumbs up! Everybody at our house liked it.
1/4 baguette, halved lengthwise
1-1/2 Tbs. unsalted butter, melted
6 medium cloves garlic
Kosher salt and freshly ground black pepper
1 small (2-1/2-lb.) spaghetti squash, halved lengthwise and seeded
1 Tbs. extra-virgin olive oil
1 lb. lean ground beef
1 small yellow onion, finely chopped
One 15-oz. can crushed tomatoes
1/4 cup coarsely chopped fresh basil
1/4 cup freshly grated Parmigiano-Reggiano
Heat the oven to 375°F.
Arrange the bread cut side up on a foil-lined baking sheet. Brush it with the butter. Peel and chop the garlic. Divide the garlic in half and sprinkle one-half with a generous pinch of salt. Using the flat side of a chef’s knife, mince and mash the garlic and salt together to form a smooth paste. Spread each piece of bread evenly with garlic paste and season with salt and pepper. Bake until light golden-brown and crisp, 12 to 14 minutes. Cut each piece in half to make 4 pieces total, and cover with foil to keep warm.
Meanwhile, arrange the spaghetti squash in a single layer in the bottom of a large, wide pot. (Don’t worry if the squash halves don’t lie completely flat in the pot.) Add 1/2 inch of water, cover the pot, and bring to a boil. Reduce to a simmer and cook until the squash is tender enough to shred when raked with a fork but still somewhat crisp, 15 to 20 minutes. Transfer the squash to a plate and set aside until cool enough to handle.
While the squash cooks, heat the oil in a 12-inch skillet over medium-high heat. Add the beef, the remaining chopped garlic, onion, 1/2 tsp. salt, and 1/4 tsp. pepper; cook, stirring to break up the meat, until just cooked through, 5 to 6 minutes. Drain and discard the fat if necessary. Add the tomatoes, basil, and 1/4 cup water; stir well and bring to a boil. Reduce the heat to medium low and simmer for 10 minutes. Season to taste with salt and pepper.
With a fork, rake the squash flesh into strands, transfer to plates, and season to taste with salt. Ladle the beef ragù over the squash and garnish with the Parmigiano. Serve with the garlic bread.
Twice-Baked Sweet Potatoes
The traditional twice-baked potato reinvented using the sweet potato, perfect for fall meals.
4 sweet potatoes
1/2 teaspoon salt
2 tablespoons butter, softened
½ cup fresh pineapple or 1 small can crushed pineapple, drained
1 to 2 teaspoons orange zest
splash of almond flavoring or Amaretto
nutmeg
Preheat oven to 350.
Scrub sweet potatoes and bake until tender, probably 45 to 60 minutes, depending on their size. Let cool.
Slice the potatoes in half and scoop out insides. Place the cooked sweet potato in a large bowl. Add the salt, butter, drained pineapple, orange zest, and almond flavoring or Amaretto. Stir well and put mixture back in potato shells or, if you'd rather, in a greased casserole dish. Top mixture with a sprinkling of fresh nutmeg.
Can be prepared up to this point and refrigerated for a day or two. Bring to room temperature before baking.)
Bake for about 15 to 20 minutes.
Makes 8 servings.
Brown Sugar and Pecan Brussels Sprouts
1 ½ pounds fresh Brussel sprouts or 2 (10 ounce) packages frozen Brussels sprouts
3 tablespoons butter
¾ cup coarsely chopped pecans, toasted
3 tablespoons firmly packed dark brown sugar
1/4 teaspoon ground nutmeg
1/4 teaspoon salt
Core fresh Brussel sprouts and steam them until just soft.
If using frozen packages, cook them according to the package directions or: bring 1 cup water to boil and add the Brussels sprouts. Return to boil, reduce heat to low, cover, and simmer about 5 minutes, until sprouts are tender. Drain and set aside.
You can slice each sprout in two, which will help them soak up more of the yummy sauce.
In a small saucepan, combine the butter, pecans, nutmeg and salt over low heat until the butter is melted.
Toss Brussels sprouts with pecans. Just before serving, pour the buttery sauce over the Brussels sprouts, tossing to coat. Serve warm.
This tasty way to serve Brussels sprouts has won over real Brussels sprouts haters.
Serves 6.
Wednesday, November 3, 2010
Loaded Alfredo

Also from Cook This, Not That*. We had this last for dinner and it was a hit! We used homemade pasta, which helped, but it would be good with the suggested whole wheat pasta, too.
It wouldn't have bothered me if the sauce had had a bit more body to it. Next time, I may use 1 cup of whole milk, and probably add a bit of Asiago cheese to it.
While we were eating dinner, we thought of lots of versions of this - smoked sausage and crawfish tails. Shrimp and asparagus instead of chicken and broccoli would be another. It would be a great dish to use up bits and pieces from the fridge. We often have grilled chicken, grilled asparagus, roasted green beans left over from various meals.
Our son loved it, too. We'll be making it again.
2 Tbsp unsalted butter
3 Tbsp flour
3 cups 2% milk
2 cloves garlic, chopped
2 Tbsp grated Parmesan
Salt and black pepper to taste
1/2 Tbsp olive oil
2 cups bite-size broccoli florets
8 oz cremini mushrooms, sliced
1/4 cup chopped sundried tomatoes
8 oz cooked chicken breast, thinly sliced (store-bought rotisserie chicken works well) - We used two grilled boneless, skinless chicken breasts.
12 oz whole-wheat fettuccine (we like Ronzoni Healthy Harvest)
How to Make It:
To make the bechamel, melt the butter in a saucepan over medium-low heat. Whisk in the flour. Cook for 1 minute. Slowly whisk in the milk to prevent any lumps from forming. Add the garlic and simmer, whisking often, for 10 to 15 minutes, or until nicely thickened. Stir in the Parmesan and season with salt and pepper. Keep warm.
Heat the oil in a large skillet or saute pan over medium-high heat. Add the broccoli and cook for 3 to 4 minutes. Add the mushrooms and tomatoes. Cook for 5 minutes, or until the vegetables have lightly caramelized. Stir in the chicken. Season with salt and pepper.
Meanwhile, cook the pasta according to the package instructions. Drain, reserving 1 cup of the cooking water. Return the pasta to the pot, add the sauce and the chicken mixture, and toss to coat. If the sauce is too thick, add some of the pasta water to thin it. Serve immediately.
Makes 4 servings / Cost per serving: $3.63
In comparison, consider the same dish at The Olive Garden:
1,220 calories
75 g fat (47 g saturated)
1,350 mg sodium
*Love this book.

Monday, November 1, 2010
Shrimp Fra Diavolo
Easy weeknight dinner

from Cook This Not That
12 oz shrimp, peeled and deveined
1 14-oz can crushed tomatoes
2 cloves garlic, minced
1-2 tsp red-pepper flakes - the recipe calls for 2 teaspoons, which was very spicy - next time I'll use a scant 1 teaspoon
4 oz dried spaghetti
1/2 Tbsp extra-virgin olive oil
1 medium yellow onion, chopped
1/4 tsp dried oregano or thyme
Salt and pepper to taste
2 Tbsp chopped flat-leaf parsley
Boil a large pot of salted water for the pasta.
Heat a large sauté pan over medium heat. Add the red-pepper flakes, olive oil, onion, garlic, and oregano or thyme, and cook until the onions are soft. Add the tomatoes.
Drop the pasta into the boiling water and cook according to package directions.
Add the shrimp to the sauce and season with salt and pepper. Cook for about 3 to 4 minutes. Drain the pasta, add as much of the sauce as you'd like, and garnish with parsley.
Wednesday, October 20, 2010
Hot Delta Dip
Creamy and full of flavor, everyone at the shower enjoyed this dip. Donna, one of the hosts, made it by tweaking a recipe that belonged to her Aunt Imogene.
3 8-oz pkgs of cream cheese
1 small jar (2.25 ounce) of Armour's dried beef finely chopped
1 bunch of green olives finely chopped
1 4 oz can of mushrooms--drained and finely chopped
1 small (2.4 oz) can of chopped ripe olives (the kind that's already chopped in the can)
3 teaspoons of Accent---that's the original recipe, and nobody needs that much msg, but it sure did spike the flavor...I used about 2 teaspoons of Tony's instead.
In the original Aunt Imogene recipe, all of that is mixed together and rolled into a ball which may be rolled in chopped pecans and served cold with crackers.
Since we wanted a hot dip, Donna used half of the cheese ball mixture and added:
3/4 cup of sour cream
3 tablespoons milk
3/4 teaspoon garlic
1 teaspoon butter, though I think the butter should have been only for the pecans.
Top with 3/4 cup of pecans sautéed in butter, though I roasted mine in a 250 degree oven for about twenty minutes.
Refrigerate until ready to use, then bake at 350 degrees for 20 minutes.
Tuesday, October 19, 2010
Miniature Pumpkin Pies with Streusel Topping and Vanilla Buttercream

I made these for the bridal shower. They were a hit, the little pockets of creamy pumpkin topped with crunchy brown-sugary goodness. I really liked them, especially since they could be made ahead of time. All I had to do the morning of the shower was pop them in the preheated oven.
Thinking about the holidays: A batch of these, frozen, would make a great gift for someone who likes to entertain. She could stash them in her freezer and have on hand for last-minute guests.
For the miniature pies:
refrigerated pie pastry, homemade or purchased; I don't judge
1 (15 ounce) can pumpkin puree
1 (14 ounce) can sweetened condensed milk
2 egg yolks
1 teaspoon ground cinnamon
1/2 teaspoon ground ginger
1/2 teaspoon ground nutmeg
1/2 teaspoon salt
2 egg whites
Preheat oven to 375 degrees.
Roll the pastry dough to about 1/4-inch thickness. Using a round cookie cutter, cut 2.5- or 3-inch circles and press into miniature muffin tins. (I can't remember if I greased them or not. Maybe I sprayed them with Pam.)
In a large bowl, mix together the pumpkin, sweetened condensed milk, and egg yolks. Stir in the cinnamon, ginger, nutmeg, and salt. In a large glass or metal bowl, whip egg whites until soft peaks form. Gently fold into pumpkin mixture.
Fill each pastry-lined muffin cup about 1/2 to 2/3 with the pumpkin mixture.
To bake and freeze for later:
Cover with freezer-grade aluminum foil and freeze. To bake, remove from freezer and bake without thawing as directed below.
To bake and enjoy now:
Bake for about 8 minutes, remove from oven, and top with the streusel mixture:
Streusel topping:
2 tablespoons all-purpose flour
1/4 cup packed dark brown sugar
1 teaspoon ground cinnamon
2 tablespoon butter, chilled
1 cup chopped, roasted pecans
Combine the flour, brown sugar, and cinnamon. Cut in the butter until the mixture is crumbly. Add the roasted pecans and toss the mixture. Top the little pies with a bit of the streusel mixture.
Bake for another 5 to 8 minutes, or until the pastry begins to turn golden. Remove from oven and cool on wire racks.
Vanilla buttercream:
1 stick butter, softened
4 cups or so of confectioner's sugar
1 teaspoon vanilla
milk
Cream the butter and add the confectioner's sugar a cup at a time. Add the vanilla and milk, one tablespoon at a time, until it's a good, thick consistency. Pipe or dollop onto cooled pumpkin pies.
This icing was a bit sweet. The next time I make these I'll make a cream cheese frosting. Or leave off the frosting altogether; the miniature pumpkin pies are really good on their own.
Yields about 4-5 dozen miniature pumpkin pies
Sweet Potato Biscuits
I served these, stuffed with ham slices, at a bridal shower over the weekend. They would also be tasty served with pepper jelly.
If you have leftover sweet potatoes, this is a good way to use them up. The biscuits can be frozen, pulled out, and baked off quickly. They're great for a fast, hot breakfast or to go alongside a roasted pork tenderloin for dinner.
1 cup all-purpose flour
1 tablespoon baking powder
1 teaspoon white sugar
1 teaspoon salt
2 tablespoons shortening
3/4 cup mashed sweet potatoes
1/4 cup milk
Preheat the oven to 400 degrees.
In a medium bowl, stir together the flour, baking powder, sugar, and salt. Cut in the shortening until pieces of shortening are pea-sized or smaller. Mix in the sweet potatoes. Add enough milk to make a soft dough.
Turn dough out onto a floured surface, and roll or pat out to 1/2 inch thickness. Cut into circles and place biscuits 1 inch apart on an ungreased baking sheet. If desired, brush biscuits with melted butter and a bit of grated nutmeg.
To freezer and serve later:
Bake biscuits for about six minutes. Let cool completely before packing in freezer zip top bags. Biscuits can be baked frozen.
To bake and enjoy now:
Bake for 12 to 15 minutes or until golden brown.
Tuesday, October 12, 2010
Black & Orange Cookies

Or brown and orange cookies.
Some people call these cookies monkey poop or cat poo. In our house, we call them "those chocolate things that you cook on the stove with the peanut butter and oatmeal."
Black & Orange Cookies is catchier, don't you think?
To make:
2 cups sugar
4 tablespoons cocoa
1/2 cup milk (I use 1%)
1 stick butter
Combine in a medium saucepan over medium heat. Bring mixture to boil. Continue to boil, stirring, for one minute. Remove from heat and add:
1 teaspoon vanilla
3/4 cup peanut butter (crunchy or smooth)
2 cups oats (See - they have oats. They're totally healthy.)
Combine well and drop by teaspoons onto wax paper or parchment paper or silpat. The mixture will be soft and wet (like monkey poo!) and will set up in a few minutes.
For Halloween, I used orange candy melts.

Craft stores and large discount stores carry them. They are orange-colored, not orange-flavored.
Put about 1/2 cup in a microwave-safe bowl.

Heat in the microwave until melted. You know your microwave best; mine took about a minute at half power, stopping every 20 seconds or so to stir well.
Ladle the melted candy in a zip-top bag and snip the very end of one corner. Drizzle the candy onto cookies and let sit.

If kids will be at the Thanksgiving table, these would make a good dessert as long as they can eat peanut butter. Kids may prefer monkey poo cookies to pumpkin pie. You could drizzle cookies with red, yellow, and orange candy melts for a fall look. Or top with sprinkles while the cookies are still wet. Go crazy with it.
Friday, October 8, 2010
Halloween Cupcakes

I love this time of year.
I made cupcakes for my son to take to school to share. Really, I wanted to experiment with chocolate spider webs as garnish for a cake. If I was going to do that, I'd need to get them out of the house fast. So. Good snack for the 3rd grade.
To make:
Bake your favorite cupcakes a day or two ahead.
Cover a couple of baking sheets with wax paper or parchment paper. Or silpats. Just cover them, to help make cleanup easy later.
In the meantime, melt some chocolate or almond bark, which is what I used. It's cheap and melts easily. I used three squares that I cut off the block 'o almond bark.
Spoon the melted chocolate into a zip-top bag. Snip the very end off of one corner. We're crafting a pastry-bag-type implement.
Make circles with the melted chocolate.

Draw "spokes" out from the center to the edge of the farthest circle.

But Keetha! They look like wagon wheels! Not spider webs!
I found that four circles looks more spider web-ish than three. I was going for the affect rather a literal interpretation of a spider web.
Let the chocolate harden up, which takes just a few minutes. When the cupcakes are frosted, peel up the chocolate spider webs.

For the buttercream:
Cream together two sticks of unsalted butter. Add 5 to 6 cups of powdered sugar and a couple of teaspoons of vanilla. Add milk, a tablespoon at a time, until it's the consistency you want. Then tint with food coloring or food paste color.
My cupcakes have orange frosting - really - only it looks yellow in the photos.

Happy Fall!
Sunday, September 12, 2010
Chocolate Cake with Coffee Meringue Buttercream

The icing is so good that I wish I could slice each one of you a piece of this cake, right here, right now.
It is my favorite of the three cakes I made for Jeffrey's birthday.
For the cake, I made one from a mix - devil's food, I think. It was good - chocolately and tender.
This buttercream is heaven - satin. It's rich and very buttery but not so very sweet. It's the bomb.
The recipe from Rose Levy Berenbaum's The Cake Bible.
Coffee-Flavored Classic Buttercream
Ingredients:
6 large egg yolks
1 cup sugar
1/2 cup water
2 cups unsalted butter, softened
1 teaspoon vanilla
2 tablespoons instant espresso powder or instant coffee, dissolved in 1 teaspoon of boiling water
Have ready a greased 1 cup heatproof glass measure near the range.
In a bowl beat the yolks with an electric mixer until light in color.
Meanwhile, combine the sugar and water in a small saucepan (preferably with a nonstick lining) and heat, stirring constantly, until the sugar dissolves and the syrup is boiling. Stop stirring and boil to the soft-ball stage (238 degrees). Immediately transfer the syrup to the glass measure to stop the cooking.
If using an electric hand-held mixer, beat the syrup into the yolks in a steady stream. Don’t allow syrup to fall on the beaters or they will spin it onto the sides of a bowl. If using a stand mixer, pour a small amount of syrup over the yolks with the mixer turned off. Immediately beat at high speed for 5 seconds. Stop the mixer and add a larger amount of syrup. Beat at high speed for 5 seconds. Continue with the remaining syrup. For the last addition, use a rubber scraper to remove the syrup clinging to the glass measure. Continue beating until completely cool.
Gradually beat in the butter. Then add the vanilla and finally, the coffee. Place it in an airtight bowl. Bring to room temperature before using. Rebeat to restore texture.
The icing can be made ahead. It will keep at room temperature for six hours, refrigerated for one week, and can be frozen for eight months. And let me tell you: I had icing leftover so it will go in the freezer. I will be dreaming up ways to use it, besides sticking my face into the container and eating it all.
Coconut Cake

This is what Jeffrey wanted as dessert following his birthday dinner of lasagne on Saturday with the family.
1 (18.25-ounce) package white cake mix
2 eggs
1/4 cup vegetable oil
1 cup cream of coconut
1 (8-ounce) container sour cream
Preheat oven to 350 degrees. Grease and flour (or use butter, parchment paper, and more butter) two eight- or nine-inch cake pans. Or two six-inch cake pans plus about a dozen cupcake rounds.
Combine all ingredients and mix for two minutes. Pour into prepared pans and bake according to package directions.
Cool cakes in pans for 10 minutes, then turn out onto wire racks to cool completely. At this point, I split the layers in two (because the more layers, the more frosting in between), wrapped them well and put them in the freezer for a week.
Frosting
8 ounces of cream cheese, at room temperature
1 stick butter, at room temperature
1 teaspoon vanilla extract
2 tablespoons cream of coconut (there should be just that much left in the can, if not, use milk)
4 cups confectioners sugar
shredded coconut*
Unlike last time, we could not get our hands on a fresh coconut. Instead, we got dried, unsweetened coconut from Fresh Market. We freshened it up by making a simple syrup of sugar and water and pouring it over the dried coconut. It got plump and sweet.
To assemble:
I toasted a couple of cups of the dried coconut at about 325 degrees, watching it v-e-r-y closely, and stirring often.
I spread icing on a cake layer and topped it with the sweetened coconut.


And repeated, until all four layers were stacked.
I frosted the sides of the cake and then the top with the remaining icing.
Per request, I pressed the toasted coconut into the sides of the cake. This way, it looks like the famed coconut cake at The Peninsula Grill in Charleston, South Carolina.

German Chocolate Cake

This the cake pictured here on the right, a tower of chocolate, pecans, and coconut.
The Husband's birthday was Tuesday. I asked him what he wanted for dessert on his birthday-birthday (as opposed to last Saturday's birthday celebration in Starkville and this past Saturday's birthday celebration at home with family). He asked for German Chocolate Cake.
I found this recipe online. It bears a striking ressemblance to the one printed on the box of Baker's sweet chocolate.
1/2 cup water
4 (1 ounce) squares German sweet
chocolate
1 cup butter, softened
2 cups white sugar
4 egg yolks
1 teaspoon vanilla extract
1 cup buttermilk
2 1/2 cups cake flour
1 teaspoon baking soda
1/2 teaspoon salt
4 egg whites
Filling:
1 cup white sugar
1 cup evaporated milk
1/2 cup butter
3 egg yolks, beaten
1 1/3 cups flaked coconut
1 cup chopped pecans
1 teaspoon vanilla extract
1/2 teaspoon shortening
1 (1 ounce) square semi-sweet chocolate
Preheat oven to 350 degrees.
Grease and flour three 9-inch round pans. For my cake, I baked it in two 6-inch cake pans and used the leftover batter to make German chocolate cupcakes. Winner!
I buttered the bottom of the cake pans, then lined them with parchment paper circles and buttered them, too. Probably overkill but I've had that sickening feeling that comes from turning a cake out and half of it plop out and the other half stick to the pan. Parchment paper helps ensure that doesn't happen.
Sift together the flour, baking soda, and salt.
In a small saucepan, heat water and 4 ounces chocolate until melted. Remove from heat and allow to cool.
In a large bowl, cream 1 cup butter and 2 cups sugar until light and fluffy. Beat in 4 egg yolks, one at a time. Blend in the melted chocolate mixture and vanilla. Beat in 1/3 of the flour mixture. Add half of the buttermilk and stir. Add another third of the flour mixture, the rest of the buttermilk, and then the rest of the flour mixutre, mixing until just combined.
In a large glass or metal mixing bowl, beat egg whites until stiff peaks form. Fold 1/3 of the whites into the batter, then quickly fold in remaining whites until no streaks remain.
Pour batter into prepared pans. Bake in the preheated oven for 30 minutes*, or until a toothpick inserted into the center of the cake comes out clean. Allow to cool for 10 minutes in the pan, then turn out onto wire rack.
*The cupcakes took about 25 minutes or so to bake. Honestly, I can't remember how long the six-inch cakes took. I baked them until the batter was just beginning to pull away from the pans.
After the cakes were cool, I split both layers in half, so that there would be more layers to separate with lots of that pecan-coconut filling.
To make the Filling: In a saucepan combine 1 cup sugar, evaporated milk, 1/2 cup butter, and 3 egg yolks. Cook over low heat, stirring constantly until thickened, which takes way longer than it should. Remove from heat. Stir in coconut, pecans and vanilla. Cool until thick enough to spread.
Spread filling between layers and on top of cake. In a small saucepan, melt shortening and 1 ounce of chocolate. Stir until smooth and drizzle down the sides of the cake.
I laid it on thick - the filling, I mean. I still had some leftover, which I topped a few of the cupcakes with.
The Birthday Boy liked it!
Thursday, September 9, 2010
Parmesan Roasted Broccoli with Pine Nuts
I first saw this recipe at Ezra Pound Cake. It's a weeknight staple.
Adapted from Barefoot Contessa Back to Basics – Ina Garten
1 (12-oz) bag of broccoli florets
3 garlic cloves, peeled and thinly sliced
3 tablespoons extra virgin olive oil
1 teaspoon lemon or lime zest
4 tablespoons pine nuts, toasted
1/2 cup parmesan cheese, freshly grated
1 tablespoon basil, julienned
Salt and pepper to season
Toast the pine nuts in a dry skillet over medium heat until they are lightly toasted. It takes only a few minutes so stay close.
Preheat the oven to 425°F.
Place the broccoli in a single layer on a baking sheet. Drizzle with a tablespoon or two of olive oil and sprinkle with salt and pepper. Roast for 15 to 20 minutes.
Remove the broccoli from the oven and toss with lemon zest, remaining olive oil, pine nuts, and chopped basil.
Serves about 4. I add any leftovers to a salad the next day.
Thursday, August 26, 2010
Butterscotch Oatmeal Lunchbox Bars

I came across this recipe last year and it's been a standard ever since. When I make a batch, I freeze most of them so that I can one out for my son's snack at school. Or a snack for me. It's a Cooking Light recipe and has oatmeal. It's totally healthy.
Cooking Light's Lighten Up Butterscotch Oatmeal Bars
1 cup packed brown sugar
5 tablespoons butter, melted
1 teaspoon vanilla extract
1 large egg, lightly beaten
9 ounces all-purpose flour (about 2 cups)
2 1/2 cups quick-cooking oats
1/2 teaspoon salt
1/2 teaspoon baking soda
Cooking spray
3/4 cup fat-free sweetened condensed milk
1 1/4 cups butterscotch morsels (about 8 ounces)
1/8 teaspoon salt
1/2 cup finely chopped walnuts, toasted
Preheat oven to 350°.
Combine sugar and butter in a large bowl. Stir in vanilla and egg. Weigh or lightly spoon flour into dry measuring cups; level with a knife. Combine flour, oats, 1/2 teaspoon salt, and baking soda in a bowl. Add oat mixture to sugar mixture; stir with a fork until combined (mixture will be crumbly). Place 3 cups oat mixture into the bottom of a 13 x 9–inch baking pan coated with cooking spray; press into bottom of pan. Set aside.
Place sweetened condensed milk, butterscotch morsels, and 1/8 teaspoon salt in a microwave-safe bowl; microwave at high 1 minute or until butterscotch morsels melt, stirring every 20 seconds. Stir in walnuts. Scrape mixture into pan, spreading evenly over crust. Sprinkle evenly with remaining oat mixture, gently pressing into butterscotch mixture. Bake at 350° for 30 minutes or until the topping is golden brown. Place pan on a cooling rack; run a knife around outside edge. Cool completely.
I stack two bars and wrap them in cling wrap. This way, I can pull out just two if that's all I need. If I need just one butterscotch oatmeal bar, I somehow manage to consume the other one, too.

I put those packages in a freezer zip-top bag.

Then my freezer is stocked with homemade goodness.
Wednesday, August 18, 2010
Pesto Chicken Salad
A couple of days this week I've had pesto chicken salad sandwich on focaccia with roasted red peppes and goat cheese for lunch. It was one of the sandwiches where I thought, "OH. SO GOOD." after every bite. I love those.
Every time I make pesto I wonder why I don't make it all the time. It's really - truly - easy. Whirl fresh basil, garlic, and olive oil* in the food processor. The last bit I made I poured into ice cubes and froze until solid. Then I put the ice cubes in a plastic bag in the freezer, ready in small portions for when I have a hankering for pesto.
Like for lunch this week. I thawed out two cubes of pesto and added the pesto to a spoonful of mayonnaise, about 1/3 to 1/2. I mixed it up and added some shredded chicken breast we'd cooked on the grill Sunday night. I refrigerated it overnight and daydream about it during the day.
* Mark Bittman cautions against adding the Parmesan cheese if you're going to freeze the pesto. He says when you're ready to use the pesto, thaw it and then add cheese.
Monday, August 16, 2010
Roasted Tomato Sauce
This may be the second-best thing I've made all summer. It, too, is a tomato dish.

Roasted Tomato Sauce
Based on a recipe from Pasta & Co. By Request
3 pounds of tomatoes
1/2 cup olive oil
8 medium to large garlic cloves, peeled
1 cup fresh basil leaves or 3 tablespoons fresh rosemary, chopped
1/2 teaspoon salt
1/2 teaspoon freshly cracked pepper
2 medium onions
Preheat oven to 325 degrees.
Core the tomatoes, and slice in half horizontally. Place the tomatoes, cut side up, in a casserole dish.
Put the basil or rosemary, olive oil, garlic, salt, and pepper in the bowl of a food processor equipped with a steel blade. Process until the garlic is finely chopped.

Pour the mixture over the tomatoes

and bake for 2 1/2 to 3 1/2 hours or until the tomatoes collapse and begin to caramelize. Your house and kitchen will smell amazing the entire time. Stir the tomatoes ever so often.
In the meantime, roughly chop up two onions and saute over medium heat in a bit of olive oil.

When they onions have some color to them, sprinkle with salt and pepper. Reduce heat as low as it will go, cover the onions, and let them be.
When the tomatoes are cooked down, remove from the pan from the oven.

Puree the sauce, plus the caramelized onions, through the food processor.
We had some the next day on pizzas and it was lovely. I froze the rest.

I plan to hit the farmer's market tomorrow for more tomatoes. This time, I'll double the recipe. I'm going to make as much of this as I can while the fresh tomatoes are still good. Just think: lasagne, all kinds of pasta, pizza, so much you can do with this sauce.
The original recipe says it yields 4 1/2 cups. I got right at 3 1/2 cups of sauce. Maybe I should triple it, now that I think about it. I want lots of sauce in the freezer to enjoy this winter.
Sunday, July 11, 2010
Tomato Tart
It's true love!

Up until I made this tart, I didn't like tomatoes, not even a little bit. Not on a burger or sandwich or salad. Now, though...
For Tomato Tart:
pie pastry
1 garlic bulb
1/2 teaspoon olive oil
1 1/2 cups shredded fontina cheese, divided
handful fresh basil leaves
2 to 3 tomatoes tomatoes
1/2 teaspoon salt
1/4 teaspoon pepper
Preheat oven to 425 degrees.
For the pie pastry, make your own if you are so inclined.
The recipe I use is my mom's:

Combine a cup of all purpose flour and 1/2 teaspoon of salt. Cut in 1/2 cup shortening (it's not a bad idea to refrigerate the shortening first) and add ice-cold water, one tablespoon at a time. Stir with a fork until the dough forms a ball. Roll out on lightly floured surface.
Or use a refrigerated pie pastry.
Either way, press the dough into the bottom and up the sides of a 9-inch square tart pan (the kind with a removable bottom although you could bake this in a 9-inch round pie pan, too). Bake for about 8 minutes or until lightly golden.
Cut off the top of a bulb of garlic and place it on a square of aluminum foil. Drizzle garlic bulb with olive oil and fold in aluminum foil to seal.
Bake for 35 minutes. Unwrap garlic and let cool. Squeeze the roasted garlic cloves onto the bottom of the baked piecrust. Smear it around and moan about how good it smells.
Reduce oven temperature to 350 degrees.
Sprinkle 1/2 cup fontina cheese over the roasted garlic.
Slice the tomatoes and place on folded paper towels. Sprinkle the tomato slices with salt and pepper and let sit for 10 minutes. The tomatoes look so pretty just like that.
Arrange tomato slices over shredded cheese. Sprinkle with remaining 1 cup cheese.
Bake for 45 minutes or until tart is lightly browned.
Eat and enjoy warm or at room temperature. Good stuff!
Tuesday, July 6, 2010
Supper from the grill

Pork tenderloin, asparagus, and potatoes. Everything but the pinot noir was readied on the grill.
Tuesday, June 8, 2010
Roasted Chicken
Jeffrey roasted a terrific turkey for Thanksgiving. It was so good, we got requests to make the same dish the same way for Christmas.
Over the weekend I used the brine recipe for chicken, which we roasted for Sunday dinner. Winner! We'll be making it again.

We served it with Parmesan-roasted white asparagus, which we won't have again - I like the green color better - and pasta salad.
Over the weekend I used the brine recipe for chicken, which we roasted for Sunday dinner. Winner! We'll be making it again.

We served it with Parmesan-roasted white asparagus, which we won't have again - I like the green color better - and pasta salad.
Monday, May 24, 2010
Sunday night
Last night we had grilled pork chops, grilled asparagus, and rice with fresh parsley for dinner.
For whatever reason, I'm not a huge fan of pork chops. They always seem to be a little dry and lacking in flavor.
These, though: Jeffrey injected them with red wine and topped them with a compound butter of unsalted butter and fresh rosemary. The pork chops were wrapped in bacon. Basically, you got your pork, butter, and more pork in the form of bacon.
It's a winner.
Friday, May 21, 2010
Dinnertime
For dinner Monday night Jeffrey seared tuna steaks. He rubbed them down with a bit of olive oil, then topped them each with a bit of redfish seasoning and Greek seasoning, then seared them in a pan of hot olive oil and a bit of butter.
I made Parmesan Roasted Broccoli with Pine Nuts that I saw at Ezra Pound Cake's website. It was really tasty; I'll make it again. My eight-year-old son gobbled it up.
I made Parmesan Roasted Broccoli with Pine Nuts that I saw at Ezra Pound Cake's website. It was really tasty; I'll make it again. My eight-year-old son gobbled it up.
Wednesday, May 19, 2010
Summer Citrust Shrimp with Parmesan Vermicelli and Grilled Green Beans

Saturday in between baking and decorating a cake I marinated shrimp for dinner. I used the recipe Jeffrey came up with last summer.
Jeffrey grilled skewers of shrimp and a grill-pan of green beans tossed with olive oil and Cavender's Greek seasoning.
I cooked vermicelli and tossed it with softened butter, freshly grated Parmesan, cracked black pepper, and a sprinkling of fresh parsley from our garden. It was really tasty. Something about that shrimp went so well with the pasta. I was hoping we'd have some leftover green beans I could put on a salad this week but we ate every last one.
Tuesday, May 18, 2010
Mom's Birthday Cake
We celebrated my mother's birthday with a big Sunday dinner. We had Shrimp and Gravy over Asiago cheese grits.
For dessert I baked and decorated a cake. After the last time, I made a box from a mix. And it was good.
While the cake cooled, I mixed up the icing:
1 stick butter, room temperature
about 4 cups of sifted powdered sugar
1 tablespoon of vanilla
a few tablespoons of milk
I creamed all that together.
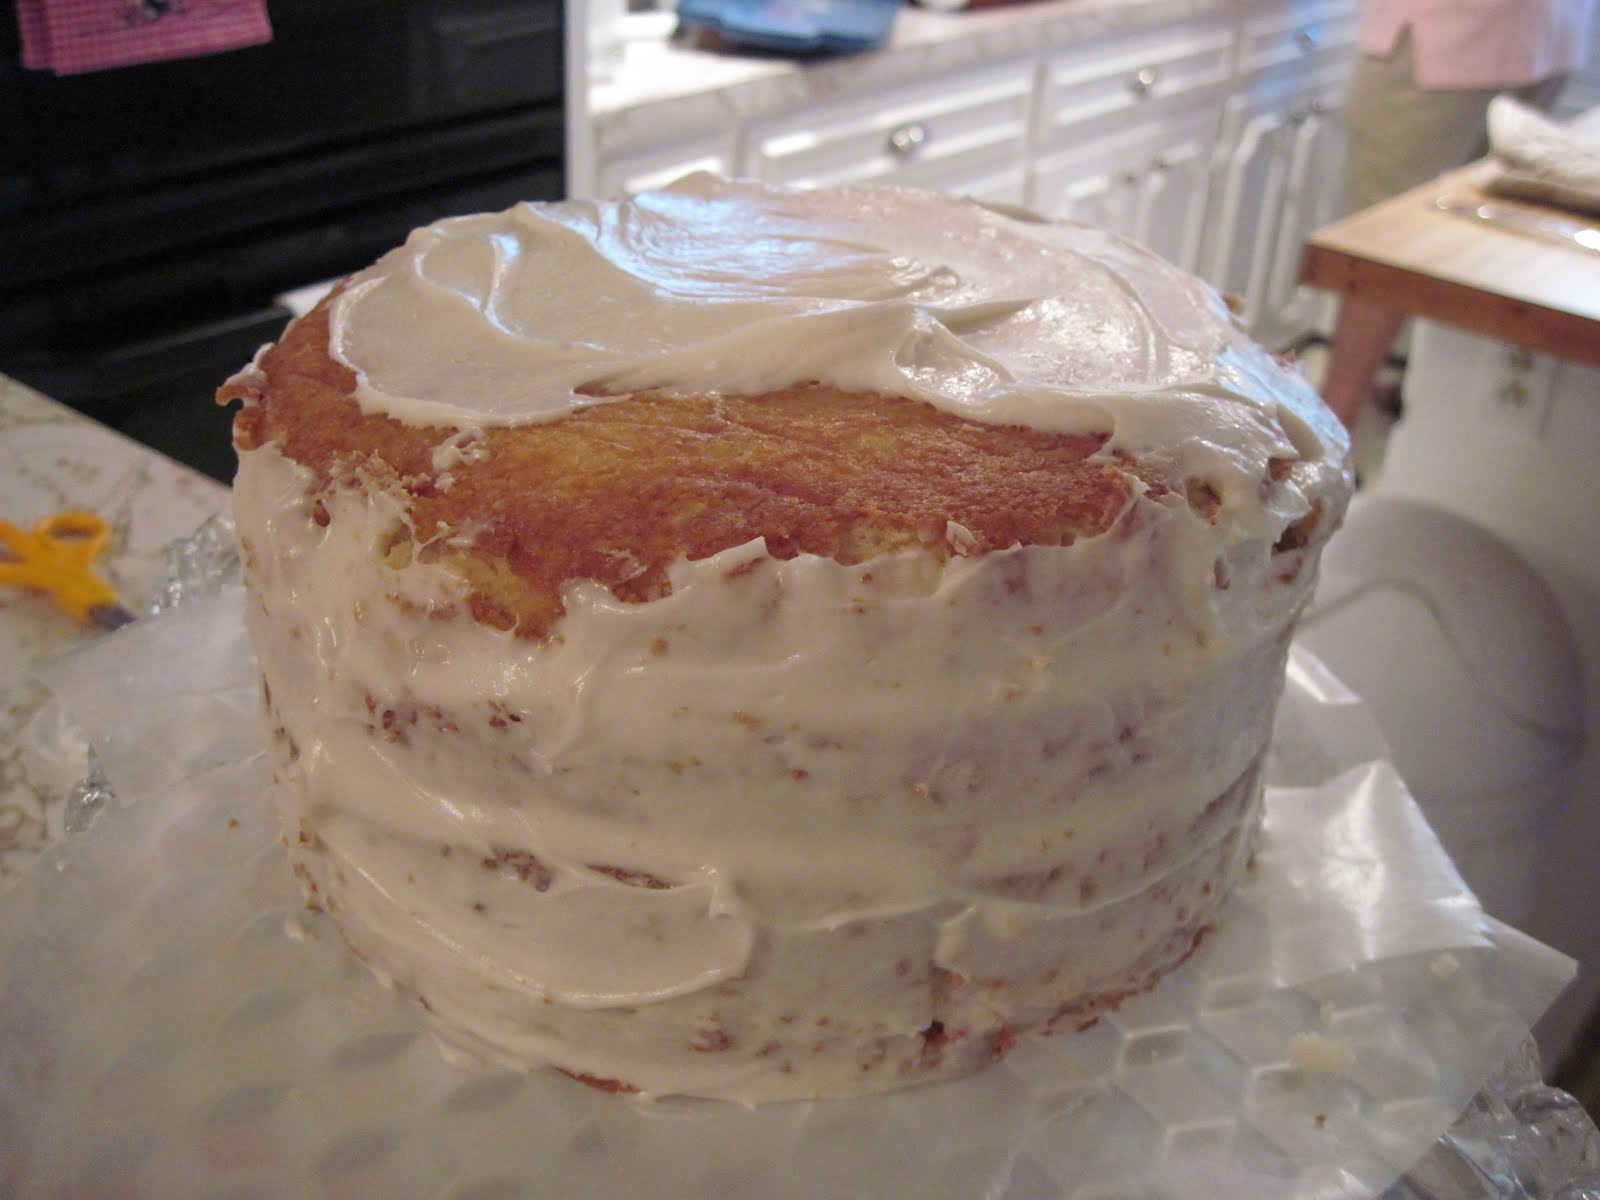
After the cake was completely cooled, I coated the cake with a thin schmear of icing. This is the crumb coat.

It's not pretty but it is effective.
After I got it on, I put in the fridge to set up. The icing hardens a bit, making the cake much easier to thoroughly frost.
I sketched out an idea of how I wanted the cake to look.

Mixed up frosting in various colors - love that part - and got to decorating.

It's far from perfect but it made Mom happy and tasted pretty good.

For dessert I baked and decorated a cake. After the last time, I made a box from a mix. And it was good.
While the cake cooled, I mixed up the icing:
1 stick butter, room temperature
about 4 cups of sifted powdered sugar
1 tablespoon of vanilla
a few tablespoons of milk
I creamed all that together.
After the cake was completely cooled, I coated the cake with a thin schmear of icing. This is the crumb coat.

It's not pretty but it is effective.
After I got it on, I put in the fridge to set up. The icing hardens a bit, making the cake much easier to thoroughly frost.
I sketched out an idea of how I wanted the cake to look.

Mixed up frosting in various colors - love that part - and got to decorating.

It's far from perfect but it made Mom happy and tasted pretty good.

Monday, May 3, 2010
Shrimp and Gravy for Supper Club
I emailed a friend and mentioned we were hosting supper club. The friend lives in Naples, Florida. Geographically, Florida is southern. Obviously. Every other way, it's really not; I shouldn't have been surprised when she emailed back and asked, "What's a supper club?"

Our supper club gets together about once a month. One couple hosts the dinner party and prepares a meal for the guests, about 20 people.

For our turn, we had Smoked Catfish Pate and fruit and cheese for appetizer. Good thing, too, because everyone arrives about 7:00 and we had so much fun visiting and catching up that it was 8:45 before we sat down at the table to eat. (Bad hosts! Bad! Note to self: next time, ask everyone to get there around 6:00.)
We had a green salad with brown-sugared pecans and sweet and sour vinaigrette.
The main course was Charleston-Style Shrimp and Grits over Asiago-Cheese Grits with Caramelized Onion.
Rhodes's rolls with honey orange butter

were on the table and lemon cheesecake with coffee for dessert.
Shrimp and Gravy
The Husband found this recipe online and we made a few adjustments to it.
3 slices bacon
1 onion, chopped
1 green bell pepper, seeded and chopped
2 teaspoons seasoned salt
1/2 teaspoon black pepper
1/2 teaspoon garlic powder
2 tablespoons butter
4 tablespoons all-purpose flour, divided
1 pound large shrimp, peeled and deveined
1 cup chicken stock
1 green onion, chopped
Fry bacon over medium heat and remove to paper towels to drain. Add the butter to the bacon grease. (I ask you: were any prettier words ever written? Add butter TO the bacon grease!) When the butter melts, sprinkle 3 tablespoons of flour over it and reduce heat to medium low. Cook for about 12 minutes, stirring frequently, until the roux is dark brown. Reduce heat if it starts to scorch.
Add the chopped onions and bell pepper when the roux is dark brown. Increase the heat to medium-high. Cook, stirring, for a couple of minutes.
Meanwhile, toss the shrimp in a large bowl with the seasonings and remaining flour. Pour in to the pan with the onion and bell pepper, stirring frequently for one minutes. Stir in the chicken stock and reduce heat to low. Cook just long enough to thicken the broth, being careful not to overcook. You don't want the shrimp to get tough!
Spoon out grits onto a plate and top with a ladle-full of the shrimp and gravy. Top with crumbled bacon and chopped green onion.
Asiago Cheese Grits wtih Caramelized Onion
Also known as: the bomb.
Asiago Cheese Grits with Caramelized Onion
1 medium yellow onion, sliced
Olive oil
4 cups water
4 cups milk
2 teaspoons salt
1 teaspoon white pepper
4 tablespoons butter
1 1/4 cups grits
1/2 pound asiago (or fontina) cheese, grated
Heat olive oil in a small skillet over medium heat. Cook onion on medium until brown. Add salt and pepper, cover, and reduce heat. Let cook until good and golden brown.
In a large pot, over medium heat, combine the water, milk, salt, pepper and 2 tablespoons of the butter. Bring the liquid to a gentle boil.
Stir in the grits.
Cook for 1 hour and about 15 minutes, stirring often.
Remove the pan from the heat
Stir in the remaining 2 tablespoons butter, cheese, and onions.
Serve immediately or spoon into a greased 9x13-inch casserole dish. Cool, cover, and refrigerate for several days. To serve let come to room temperature, and heat at 350 degrees for about 30 minutes.
Sprinkle with paprika before serving.
Thursday, April 29, 2010
Nutella Pinwheels
Two of the easiest, tastiest, most convenient products: Nutella spread (chocolate and hazelnut near the peanut butter at the grocery store) and puff pastry.
True love!
Follow package instructions to thaw puff pastry sheet, roll out slightly on a lightly floured surface. Then spoon over the Nutella. Nom nom nom.
Roll up lengthwise, let chill for easier slicing, and cut into spirals. If you have hazelnuts on hand, you can chop a handful and sprinkle on top.
It doesn't matter if the pinwheels aren't pretty.

They bake up nice.

Nutella Pinwheels are perfect make-ahead treats, too. Roll up, wrap well, and freeze. They're good to have in the freezer so they'll be handy if you have a sugar and carb emergency. Thaw the puff pastry logs slightly at room temperature, slice, and bake.
Monday, April 19, 2010
Disappointing yet delicious-sounding: Homemade Yellow Cake with Chocolate Cream Cheese Icing
 It's not even that pretty, just a poky little cake.
I understand that when cake mixes first came out, ads touted their efficiency qualities, how they'd make things easier for the little woman in the kitchen.
No woman wanted to that woman, the one talked about in the coffee klatch because she is too lazy, too selfish, and too cold to her husband and her poor children to make a cake from scratch.
Food marketers wised up and changed their ads so that they emphasized the yumminess that was cake from a mix; then cakes baked from a mix became something special and delicious, not just the same old, same old that any woman can mix up.
I'll tell you; I was raised mostly on cake mix cakes. They're good! Yes, they are.
I'll tell you something else; I've never baked a homemade from scratch cake (that wasn't chocolate) that tasted good. They're edible but only just. They always turn out packy and dense and unappetizing.
I like to bake. I like to sift flour and get out my measuring cups and measuring spoons. I enjoy getting to use a whisk. I like having that red box of Swans Down Cake Flour in the kitchen.
When I offered to bring a dessert for my mother's house for Sunday dessert, I decided to bake a homemade cake for fun.
Baking it was fun. Eating it? Not so much.
The cake was packy and dense and unappetizing, like the others I've made. They're all different recipes but I have to wonder if I'm doing something wrong.
I have this recipe saved and no idea from whence it came.
All-American, All-Purpose Yellow Cake
Butter and flour for preparing cake pans
2 1/2 cups cake flour
1 tablespoon baking powder
1 teaspoon salt
12 tablespoons unsalted butter, softened
1 1/2 cups granulated sugar
5 large eggs
1 cup milk
2 teaspoons vanilla extract
1. Remove butter and eggs from refrigerator about 2 hours before starting recipe. Heat the oven to 350*F (175*C). Adjust oven rack to the middle position.

Butter two 9-inch cake pans, cover the bottom of each pan with a circle of parchment, butter the parchment and coat the pan with flour, shaking out the excess.
2. Sift together flour, baking powder and salt.
3. Beat butter in a large bowl with an electric mixer at medium speed for 30 seconds. Continue beating and gradually add the sugar. Beat until light-colored, about 3 minutes. Add eggs, one at a time, beating after each addition. The mixture should appear thick and dull. If it appears separated or grainy and shiny, the butter and/or eggs were too cold. To remedy this, wrap the bowl with a kitchen towel soaked with hot water and continue mixing. Scrape down the sides of the bowl when necessary.
4. Add about 1/3 of both the flour mixture and milk and beat on low speed or by hand until just incorporated. Add the vanilla and then the remaining flour and milk in two batches, beating between additions. Scrape down the sides of the bowl and stir by hand to finish.
5. Divide the batter between the prepared pans. Twist the pans back and forth on the work surface to distribute batter and then smooth surface with a rubber spatula. Place pans in oven a few inches apart, and bake for about 30 minutes, rotating the pans 180 degrees after 15 minutes. Check the cake after 22 minutes. The top of the cake should be golden brown and spring back when lightly pressed in the center, and a cake tester should come out clean. The cakes should start shrinking back from the sides of the pan.
6. Remove the pans to a cooling rack. Let rest for 5 minutes. Run a small knife or metal spatula around the sides of the pans and invert cakes onto lightly greased racks. Remove parchment paper.
 These cakes smelled so good while they're were cooling - all luscious and vanilla-y.
 Reinvent cakes onto cooling rack. Let cool for at least 1 1/2 hours or until completely cooled.
Makes one 2-layer cake; serves 12.
Chocolate Cream Cheese Frosting
4 ounces unsweetened chocolate
1 (8-ounce) package cream cheese, at room temperature
4 cups confectioners' sugar
1 tablespoon vanilla
dash salt
milk
Melt chocolate in a double boiler or in the microwave if you know your microwave well.

 Chocolate + cream cheese. How could that go wrong. I ask you.
 In a large mixing bowl, beat cream cheese until fluffy. Pour the melted chocolate over the cream cheese.

Mix on medium speed until well blended. Add the vanilla and salt and slowly stir in the confectioners sugar.
Scrape the sides of the bowl and increase mixer speed to medium-high. Slowly add a tablespoon or two of milk if needed.
This should have been dreamy but it wasn't. While I was shopping for the ingredients I had an inkling that bittersweet or semi-sweet chocolate would be better. I should have paid attention to my intuition. It was trying to help.
This frosting I would make again. The cake, I doubt it. Seriously.
Monday, April 5, 2010
Coconut Cake
Sunday afternoon at my grandparents were spent around the dining room table. From the time I was a little girl, I remember being drowsy with good food, sunlight streaming in through the curtains, the hum of grownups’ voices. The women talked about garden club meetings, recipes exchanged in the grocery store, bridge club, bake sales, funerals. When a coconut cake was mentioned, it was with hushed and reverent tones.
I didn’t – and still don’t - like coconut so I didn’t understand the awe associated with coconut cake.
When I was old enough to bake myself, I still didn’t get it. How hard could it be? What was the big deal?
Now I get it. I see what the big deal is. I know why baking a coconut cake using fresh coconut is a very big deal indeed.
I learned this Saturday when I made one to celebrate Easter.
The Husband poked the three “eyes” of the coconut and drained the coconut water.
He used a chisel and a hammer to crack the coconut open.

That took some doings.

Finally, success!

That was the easy part. The halves then had to be broken into pieces. The Husband broke the halves into shards. Next you’re supposed to peel off the shell. Just peel it off.
It didn’t go that smoothly. You had to take off small pieces of the shell, bit by bit. It was about as efficient, fun, and easy as peeling off old, stubborn wallpaper.

We grated the coconut and lost count of how many times we scraped knuckles and fingers on the grater.
For all that work The Husband did, this is how much coconut he got:

Seems like a lot of sugar for a dime.
I traced a six-inch cake pan onto parchment paper and cut around the circles.


I love cake pans. So pretty and shiny.
I buttered the bottoms of two six-inch cake pans, lined them with the parchment paper circles, and buttered the parchment paper. (I keep the wrappers sticks of butter come in for just this purpose.) That may be one extra step too many but that way, I don't have to worry about the cake sticking to the bottom of the pan, no matter what.
The cake:
1 (18.25-ounce) package white cake mix
2 eggs
1/4 cup vegetable oil
1 cup cream of coconut
1 (8-ounce) container sour cream
Preheat oven to 350 degrees. Line about two dozen cupcake pans with paper liners.
Combine all ingredients and mix for four minutes. Pour into prepared pan.
Bake according to package directions and cool on wire rack.
(This yielded enough batter for two six-inch round cakes and about a dozen cupcakes.)
I let the cake cool a bit before brushing the tops of the cake layers and cupcakes with the reserved drained coconut water.
While the cake soaked up the coconut water I did the first round of unloading the dishwasher, loading it back, and washing the mixing bowl and my favorite measuring cups.
The frosting:
8 ounces cream cheese, at room temperature
1 stick butter, at room temperature
1 teaspoon vanilla extract
2 tablespoons cream of coconut (there should be just that much left in the can, if not, use milk)
4 cups confectioners sugar
shredded coconut
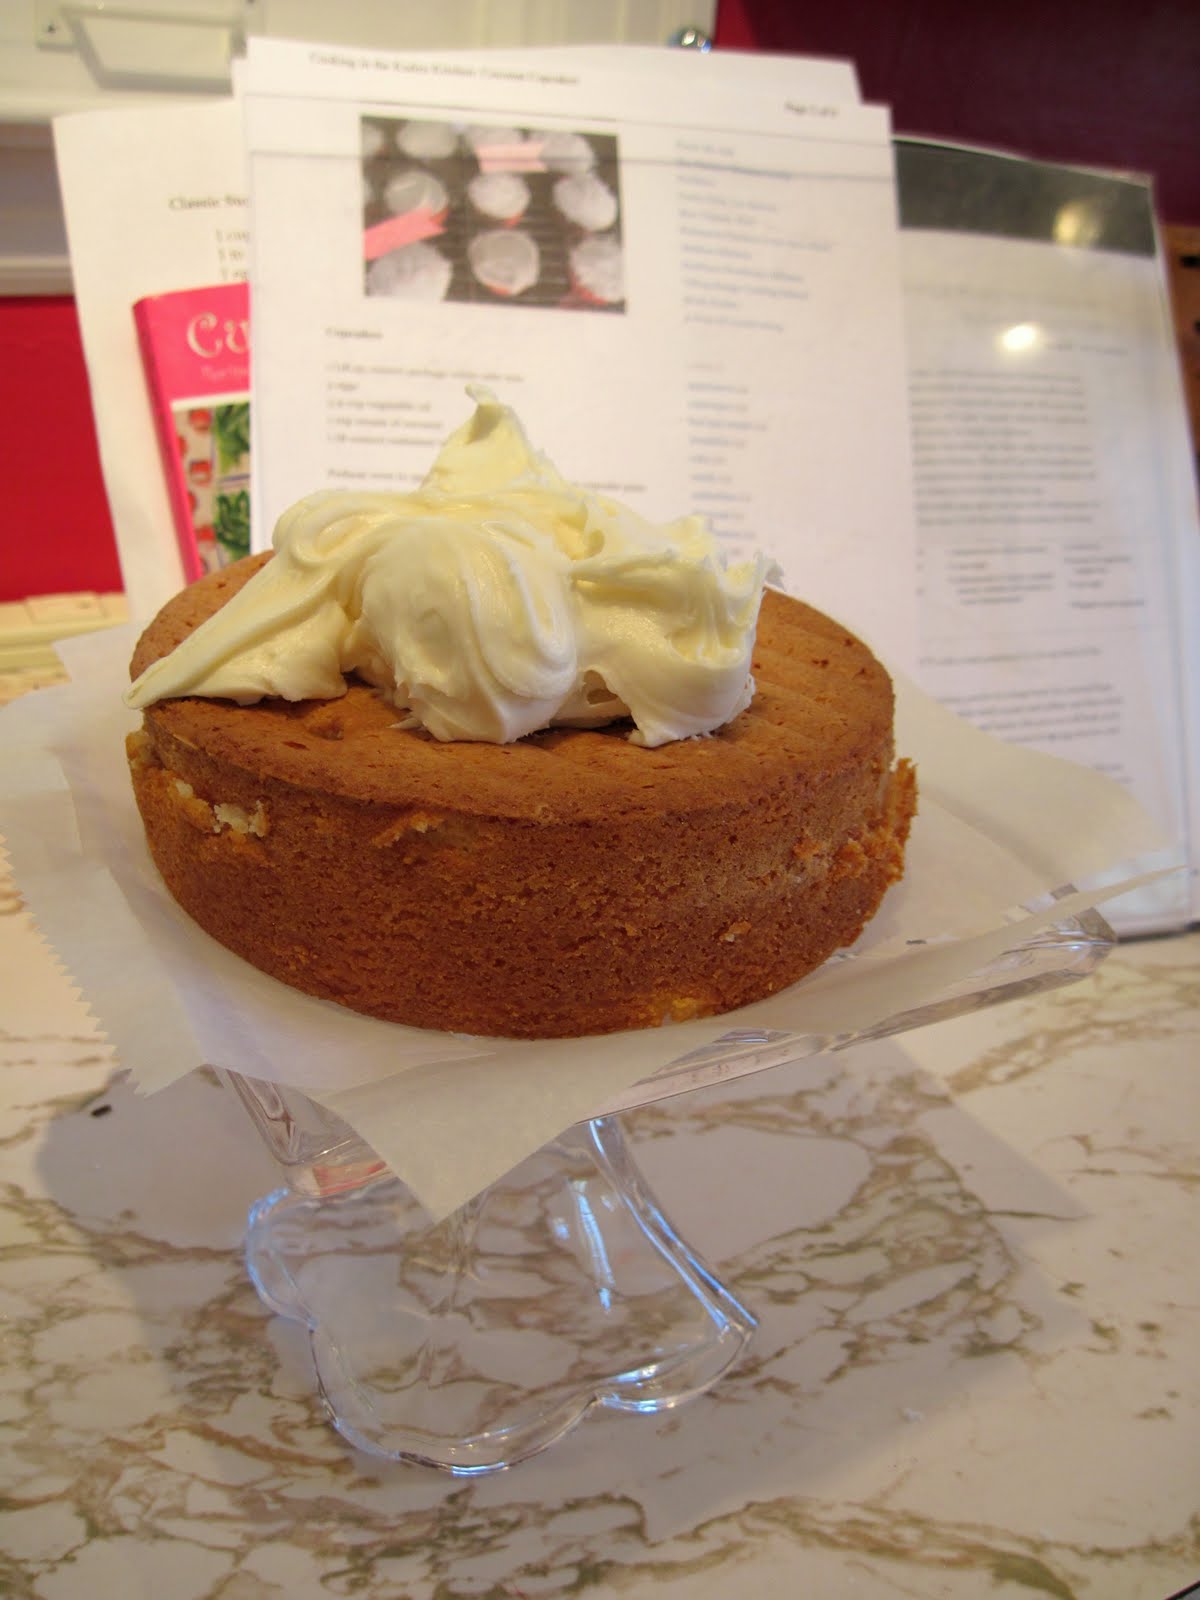
The fun part: icing the cake.

And the cupcakes

The cakes got a thin layer of icing, a crumb coat. I refrigerated the cake for a few minutes to let the crumb coat set up. I took it from the fridge and slathered on the icing. With the crumb coat nice and chilled, the rest of the frosting goes on smoothly and easily because I don't have to worry about snagging a bunch of unslightly crumbs and dragging them into the icing. The icing is topped with the grated coconut.

Those flecks of brown are from the paper-thin layer surrounding the coconut. The fact that it’s not pristine white shows that an actual coconut was used and should be viewed as a good thing, a sign of authenticity.
Is what I tell myself anyway.

The Husband, who loves coconut cake, and the reason I made the cake, loves it. My grandmother said she thinks that’s the best coconut cake she’s ever had. High praise.
I didn’t – and still don’t - like coconut so I didn’t understand the awe associated with coconut cake.
When I was old enough to bake myself, I still didn’t get it. How hard could it be? What was the big deal?
Now I get it. I see what the big deal is. I know why baking a coconut cake using fresh coconut is a very big deal indeed.
I learned this Saturday when I made one to celebrate Easter.
The Husband poked the three “eyes” of the coconut and drained the coconut water.
He used a chisel and a hammer to crack the coconut open.

That took some doings.

Finally, success!

That was the easy part. The halves then had to be broken into pieces. The Husband broke the halves into shards. Next you’re supposed to peel off the shell. Just peel it off.
It didn’t go that smoothly. You had to take off small pieces of the shell, bit by bit. It was about as efficient, fun, and easy as peeling off old, stubborn wallpaper.

We grated the coconut and lost count of how many times we scraped knuckles and fingers on the grater.
For all that work The Husband did, this is how much coconut he got:

Seems like a lot of sugar for a dime.
I traced a six-inch cake pan onto parchment paper and cut around the circles.


I love cake pans. So pretty and shiny.
I buttered the bottoms of two six-inch cake pans, lined them with the parchment paper circles, and buttered the parchment paper. (I keep the wrappers sticks of butter come in for just this purpose.) That may be one extra step too many but that way, I don't have to worry about the cake sticking to the bottom of the pan, no matter what.
The cake:
1 (18.25-ounce) package white cake mix
2 eggs
1/4 cup vegetable oil
1 cup cream of coconut
1 (8-ounce) container sour cream
Preheat oven to 350 degrees. Line about two dozen cupcake pans with paper liners.
Combine all ingredients and mix for four minutes. Pour into prepared pan.
Bake according to package directions and cool on wire rack.
(This yielded enough batter for two six-inch round cakes and about a dozen cupcakes.)
I let the cake cool a bit before brushing the tops of the cake layers and cupcakes with the reserved drained coconut water.
While the cake soaked up the coconut water I did the first round of unloading the dishwasher, loading it back, and washing the mixing bowl and my favorite measuring cups.
The frosting:
8 ounces cream cheese, at room temperature
1 stick butter, at room temperature
1 teaspoon vanilla extract
2 tablespoons cream of coconut (there should be just that much left in the can, if not, use milk)
4 cups confectioners sugar
shredded coconut
The fun part: icing the cake.
And the cupcakes

The cakes got a thin layer of icing, a crumb coat. I refrigerated the cake for a few minutes to let the crumb coat set up. I took it from the fridge and slathered on the icing. With the crumb coat nice and chilled, the rest of the frosting goes on smoothly and easily because I don't have to worry about snagging a bunch of unslightly crumbs and dragging them into the icing. The icing is topped with the grated coconut.

Those flecks of brown are from the paper-thin layer surrounding the coconut. The fact that it’s not pristine white shows that an actual coconut was used and should be viewed as a good thing, a sign of authenticity.
Is what I tell myself anyway.

The Husband, who loves coconut cake, and the reason I made the cake, loves it. My grandmother said she thinks that’s the best coconut cake she’s ever had. High praise.
Subscribe to:
Comments (Atom)